September 3, 2013

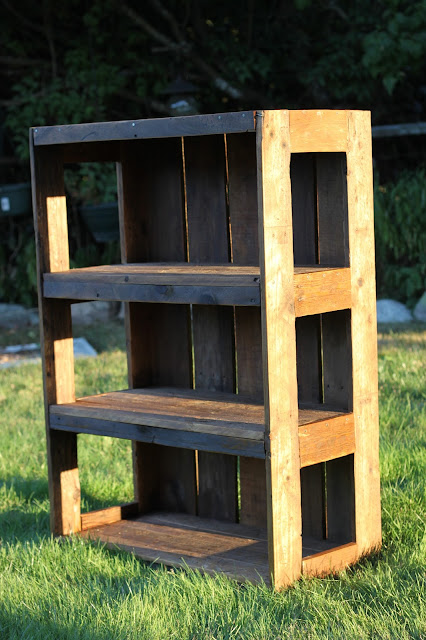
{ DIY Pallet Bookshelf }

I'd been wanting to make a pallet bookshelf for our bedroom for a long time!
I finally got some old pallets for free from work a few months ago, and Mikhal was able to disassemble them for me using this trick  I read about on Pinterest!  :) 
The neatly stacked pile of wood has been sitting in our driveway waiting for me for a while now, and we finally had the time to get started last weekend! 

First things first, a plan--of course! 
Then lots of selecting & measuring...

Then lots of cutting... 

Then, in order to make it a little less rustic, ;) I chose to do at least a general sand on all the pieces.


Proof that I did it myself. :) 
(Don't mind the Donald Trump hair!) 

Well  I did MOST of it myself. :) 

On of the shelves, finished! :) 

And all three! :) I love that there's a slight zebra texture on some of the boards. 

Like this one. :) 

Oh, did I mention that I got a new 50mm lens since my last blog post? :) I'm LOVING it! 


The bottom with the back pieces attached...

With both the bottom & top attached.. :) 

Then I didn't do a very good job documenting the next few steps; although I did try! I took some pictures, but didn't realize until too late that I didn't have a memory card loaded.  *sigh 

What was missed: 
-Adding the shelves
-More sanding (with a more fine grit sandpaper)
-Adding the aesthetic pieces on the fronts & sides
-Staining

FINISHED! 


I'm SO SO SO SO happy with how it turned out! 

And here's how it looks in our room..
The before: 

And the after: 

Now it's just a matter of getting everything loaded into it in an artistic manner. :) I'm going to keep my eye out for some cute baskets to help store some miscellaneous items in. Can't wait to post one more follow up once I've got everything situated! :) 

July 25, 2013

{FORE!!}

Well it feels like it took me forever to finish this quilt, but I think it's because it was just so "outside the box" compared to the piecework quilts I'm used to doing! 

This one is for new friends of ours from church who just had their little guy earlier this month! His Dad loves golf, and that was one of the things they mentioned they'd like when we were discussing inspiration. I had this idea pretty soon after, and then it was just the process of getting my idea down on paper (with my sister in law, Marina's help), and then getting it from paper to material! 

I  machine appliqued the pieces together (which means they are layered on top of each other, not sewn next to each other like in typical piecing), and I think it turned out pretty cute! 


Front 
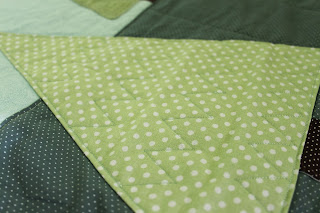
Back 
(Those are cute little trees! I'm annoyed that I didn't get a better picture of them, or write down the designer/name!) 

These other ones are some more detailed shots. I also stepped outside the box with the quilting! I thought this would be a good opportunity to practice adding dimension. If you look closely you'll see the chevron pattern on the trees (for "leaves"), and the mow lines in the turf! :) 


So happy with this finished product, but even more happy to be able to give it to a family that we really feel blessed to know! 

June 16, 2013

{Baby Showers & Household DIY Projects}

Oh my goodness, I think I might, no, I really I need to start doing a better job of posting more often! Or at least keeping better notes of my recent craft escapades so that I don't need to try to cram so much into each post when I do get on here! 

Sound like a plan to you? :) 

So as I mentioned in a recent facebook status update, I've been feeling a) really busy lately, and also on b) crafty-brain overload! I don't know if this happens to anyone else, but I'll go really hard on craft projects for a while with no break, and then I realize that I am BURNT OUT and need a little break. I think I felt that way this past month with quilting; I kept up on tons of other DIY projects (more about that later), but this most recent quilt I finished & delivered took me just about the whole month to make, which never happens! 

The neat thing about that, though, is that this quilt was for a very sweet, long-time friend of mine who is having a little baby boy this August! I don't speak of it much, but as often as I remember when I'm making a quilt for a specific baby, I try to pray over them, their future, etc....so the benefit of having this quilt, and this quilt alone on my plate for the past month is that God has used it to keep my beautiful friend & her little guy at the fore-front of my mind, and in my prayers!  Can't wait to meet Mr. Leiden! :) 

So a couple of months ago, I had a brief discussion with Lacey about quilt ideas, and she mentioned that she loved chevrons, and a green/white/gray/black color scheme for the nursery, both of which I had an inkling about already; so the wheels were already turning! This is what I came up with: 

(Note to self...and my readers. No, my iron is not broken, and I'm not quite sure my excuse is for always taking pictures of my quilts at their most wrinkly moments? Sheesh.. I'll work on that for next time. *wink)

(Folded in half)

LOVE how simple chevrons really are when you break them down into their most basic shapes, 1/2 square triangles! 

Decided on a cute, but coordinating, "quieter" fabric for the back in case she gets tired of seeing the chevrons! 
(Although technically you can see the imprint still from the quilting in green thread... I couldn't resist! I think it turned out so cute!) 


While I was making another trip to The Happiest Place on Earth (aka: Joanns), I found this ADORABLE "bag fabric" near the utility fabrics and just knew I had to get it! I ended up making a cute & simple re-usable tote bag that I also used as the gift wrapping!


Lacey's shower was yesterday, and it was such a great celebration of her & baby Leiden! I just love getting to be a part of the joy surrounding this new little guy that hasn't even made his appearance yet! 

Our mutual friend, Casey was there, did this great little summary of the shower, and had her camera on hand to capture this special moment as Lacey was opening her gifts:

{Photo Credit: Casey H. 06/2013}
It's funny (not just because I look like a GOOF), but because I don't think many people understand the absolute JOY that getting to make these quilts for people that I love brings to me!  I so LOVE that I get to have this as a memory! :) {Thanks again, Casey!}

Okay, now a summary of the DIY projects we've been accomplishing at home!

Here are the "before" pictures of our kitchen cabinets/counters:

Practical enough, and much better than what was there when we moved in, but not quite perfect, yet! Then we found two laminate counter pieces at Home Depot for $36/ea (regularly $145!), and this is what we came up with:


And this finished product deserves a few shout-outs! First, Mikhal helped SO much with fixing and stabilizing these cabinets that we found on craigslist, and making replacement drawers! And Alex & him worked together to get the vent adjusted, and got the counter tops installed. 

Another Michael, my brother in law's brother (no I'm not stuttering) made us the three great drawer fronts (on the left above the doors)! 

I found the curtain material at Joanns, and just LOVE it. There are so many cute colors, it matches the "hodge-podge" of kitchen towels, etc.. that we have in our combined household. Perfect! 

Now I'm going to spend the next few months slowly working on additional "finishing touches" like these:


Cute $5 jars from Ross for storage above our stove! Love that it is starting to look more intentional and less cluttered. :) 

I had a perfectly sized spare piece of the same flowered material left, and made this cute "cafe curtain" to help draw the material in on the other side of the kitchen. I think I might get some more and make some coordinating dish towels or pot holders to help bring the material through the rest of the kitchen too. And like I mentioned earlier, there are so many great colors in the material that decorating is a new fun adventure! There will be so many different things that match, so now it's a matter of picking just a couple of ideas! 

The other project that we finally finished up is the "office" portion of our bedroom! I had made heavy canvas-esque curtains when we first moved in that I ended up not liking due to their stiffness and weight.. so those got moved over to our make-shift closet, and I made these much softer "linen" curtains to go over the cute lace under-lay that picks up our red accents. 
And we finished the chair to match our desk/table! WAHOO! Mikhal did such a great job with the stain (it matches so well), and then it was just a matter of me having the time to paint the legs and back red, and clear coat the whole thing. Love that it's finally all together as a set. :) 


Anyway, this is kind of the fly-by, stick your face out the window a free-way speeds version of what we've been working on recently! I hope you have enjoyed the summary! I'm going to be doing some serious thinking in the next few weeks about product, projects to upload to my Etsy! The burp cloths I had up have since expired, and I really didn't have much interest in them, so I want to expand the types of items I have posted to hopefully get it up and running with a bit more success. 

My plan is also to look into some more craft sales/bazaars, because I think the face to face interaction would be a great way to get my name out there some more! 

Any tips or suggestions about types of items to work on/look into? 

I appreciate you all, and will do my best to update more often, and with some additional variety (topical)! :) 

Until next Time... 

April 30, 2013

{Recent Projects}

Well it's been a little while since I posted, mainly because I've been busy working on a few different projects! I'll try to get them all re-capped here on the blog!

1) First, a quilt I just finished a week or so ago! This is for a good friend of mine that I've known for YEARS who is expecting a little girl in a couple of months!

Her & I have been pen pals for probably about 10 years, and in one of her letters she mentioned that they were doing a "jungle" theme in her nursery! I saw this fabric at Joanns and thought it would look really cute!
Her baby shower was this weekend, and when she opened the box up; she mentioned that this is the same fabric she had seen and picked out for some other items a friend of hers was making for the room! :)

Some may call it a coincidence, but I think it's a God thing! :) Just reminds me that what I'm doing is somehow more important than just a warm blanket.

I'm calling this pattern "interrupted chevrons" :) I loved all the coordinating colors, but also really wanted to highlight the CUTE main fabric. 


{By the way, I'm realizing that I really should IRON these puppies before taking pictures! I always fold them up while I'm sewing the binding, which is the last stage, and then they get these horrible creases in them!}


2) One of my next projects was a DIY, rather than a quilt! I had been really hating our address letters, because they were tiny, hard to read, and just plain BLAH.

BEFORE:

 I had seem some different Pinterest inspirations, and this is what I came up with:
AFTER: 

I love that it's so much bigger, brighter, and CUTER! :)

3) Another cute DIY I did was inspired by, or should I say requested by a friend of mine from church! She was putting together a baby shower for a mutual friend of ours, and when I asked how I could help, she asked if I'd make a cute fabric banner to hang up for decoration!
I had seen these around a bunch on pinterest, but hadn't ever tried to do one of my own; but boy I'm glad I did! I think it turned out super cute, and it was SO simple! (Maybe I'll try a tutorial on it soon!) I'm considering adding this to my Etsy "arsenal". :)
I'm bummed that I didn't get a picture of it hanging up at the shower, but needless to say, I was proud of it! :) Can't wait to try others in various sizes and materials! 

4) Next project was another DIY, this time for our kitchen!
The BEFORE:
This is how we kept track of the dishwasher status (which is important when you have different people loading/unloading/starting the dishwasher all the time--this was a step up from always having to ask "is the dish washer clean or dirty?", but still not quite practical or CUTE enough. :)

I was inspired by some different Pinterest posts that used scrabble letters, but rather than having to rob from our game, or order new letters, I raided my collection of left over letters from the "Love" project I did in our bed-room last year, and this is what I came up with:
The After:

 Much cuter, if I do say so myself! :)

5) And last but not least, a quilt I finished just last week; a custom commission by my sister for her friend who is due with a little boy in the near future:
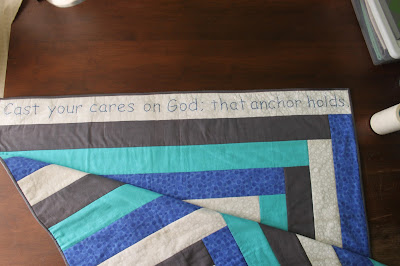
We checked her baby registry and saw that she had a kind of nautical/whale theme going, and we found this cute whale themed fabric at Joanns to use for the backing! The front is just coordinating solids & patterns, with some personalized embroidery!


Then as a surprise, both to the recipient, and my sister,  I made some cute "extras" withe leftover whale material!


 Overall, I'm really happy with how it all turned out! For the burp cloths, I just used the multiple layers of flannel/cotton, rather than the diaper core I had done before. I just wasn't as happy with how those were looking after I was finished, and I think these turned out super cute! I may consider adding additional layers inside to add extra absorbency, but I need to test it.

Well that's it for now! I'm working on another quilt to sell (sneak peak pictures going up on Facebook today), and then I have three custom projects to work on after that! :) Phew, keeping me busy, but loving every minute of it!

:) Until next time...